
Freezer paper...found it at the grocery store right near the aluminum foil and saran wrap. I've never bought it before, never needed to, but now I have a ginormous roll in my kitchen drawer that will most likely be used for non-kitcheny things. The box itself has instructions for fabric stenciling so I can't be accused of stealing anyone's genius idea here.
The possibilities are endless (think tote bags, throw pillows, even wall art) but I started with t-shirts, 99 cent t-shirts from Goodwill to be exact.

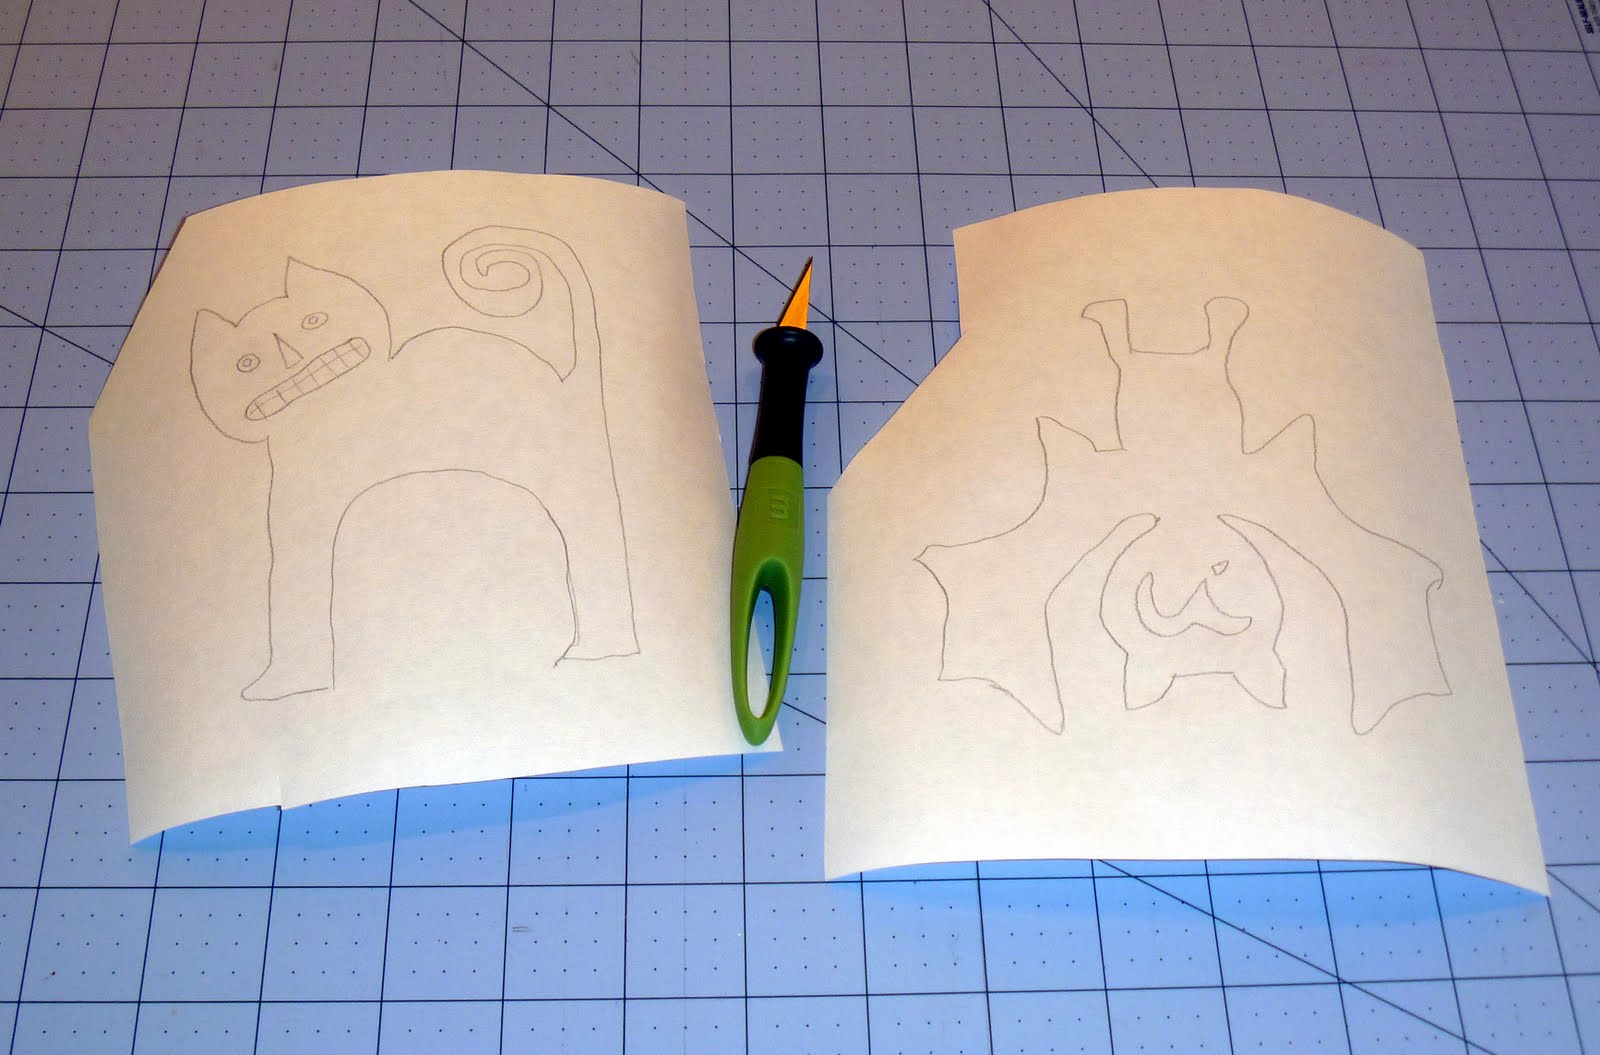
And I decided to do Halloween shirts for the kids. The holiday lends itself to basic silhouetted images so that made it easy for a beginner like me. I googled "halloween clip art" and found a couple cute designs. I read that you can put freezer paper through your printer, but since ours was out of ink I didn't even attempt that. With my luck it would've gotten clogged or jammed in the printer anyway, then I would've been in big trouble. So, I chose the primitive method of tracing. Right from my laptop screen. I just put the paper up and traced very VERY gently with a pencil, drawing on the non-shiny side of the paper.

Then I took my exacto knife and cut out the design, including little eyes, mouths, etc.

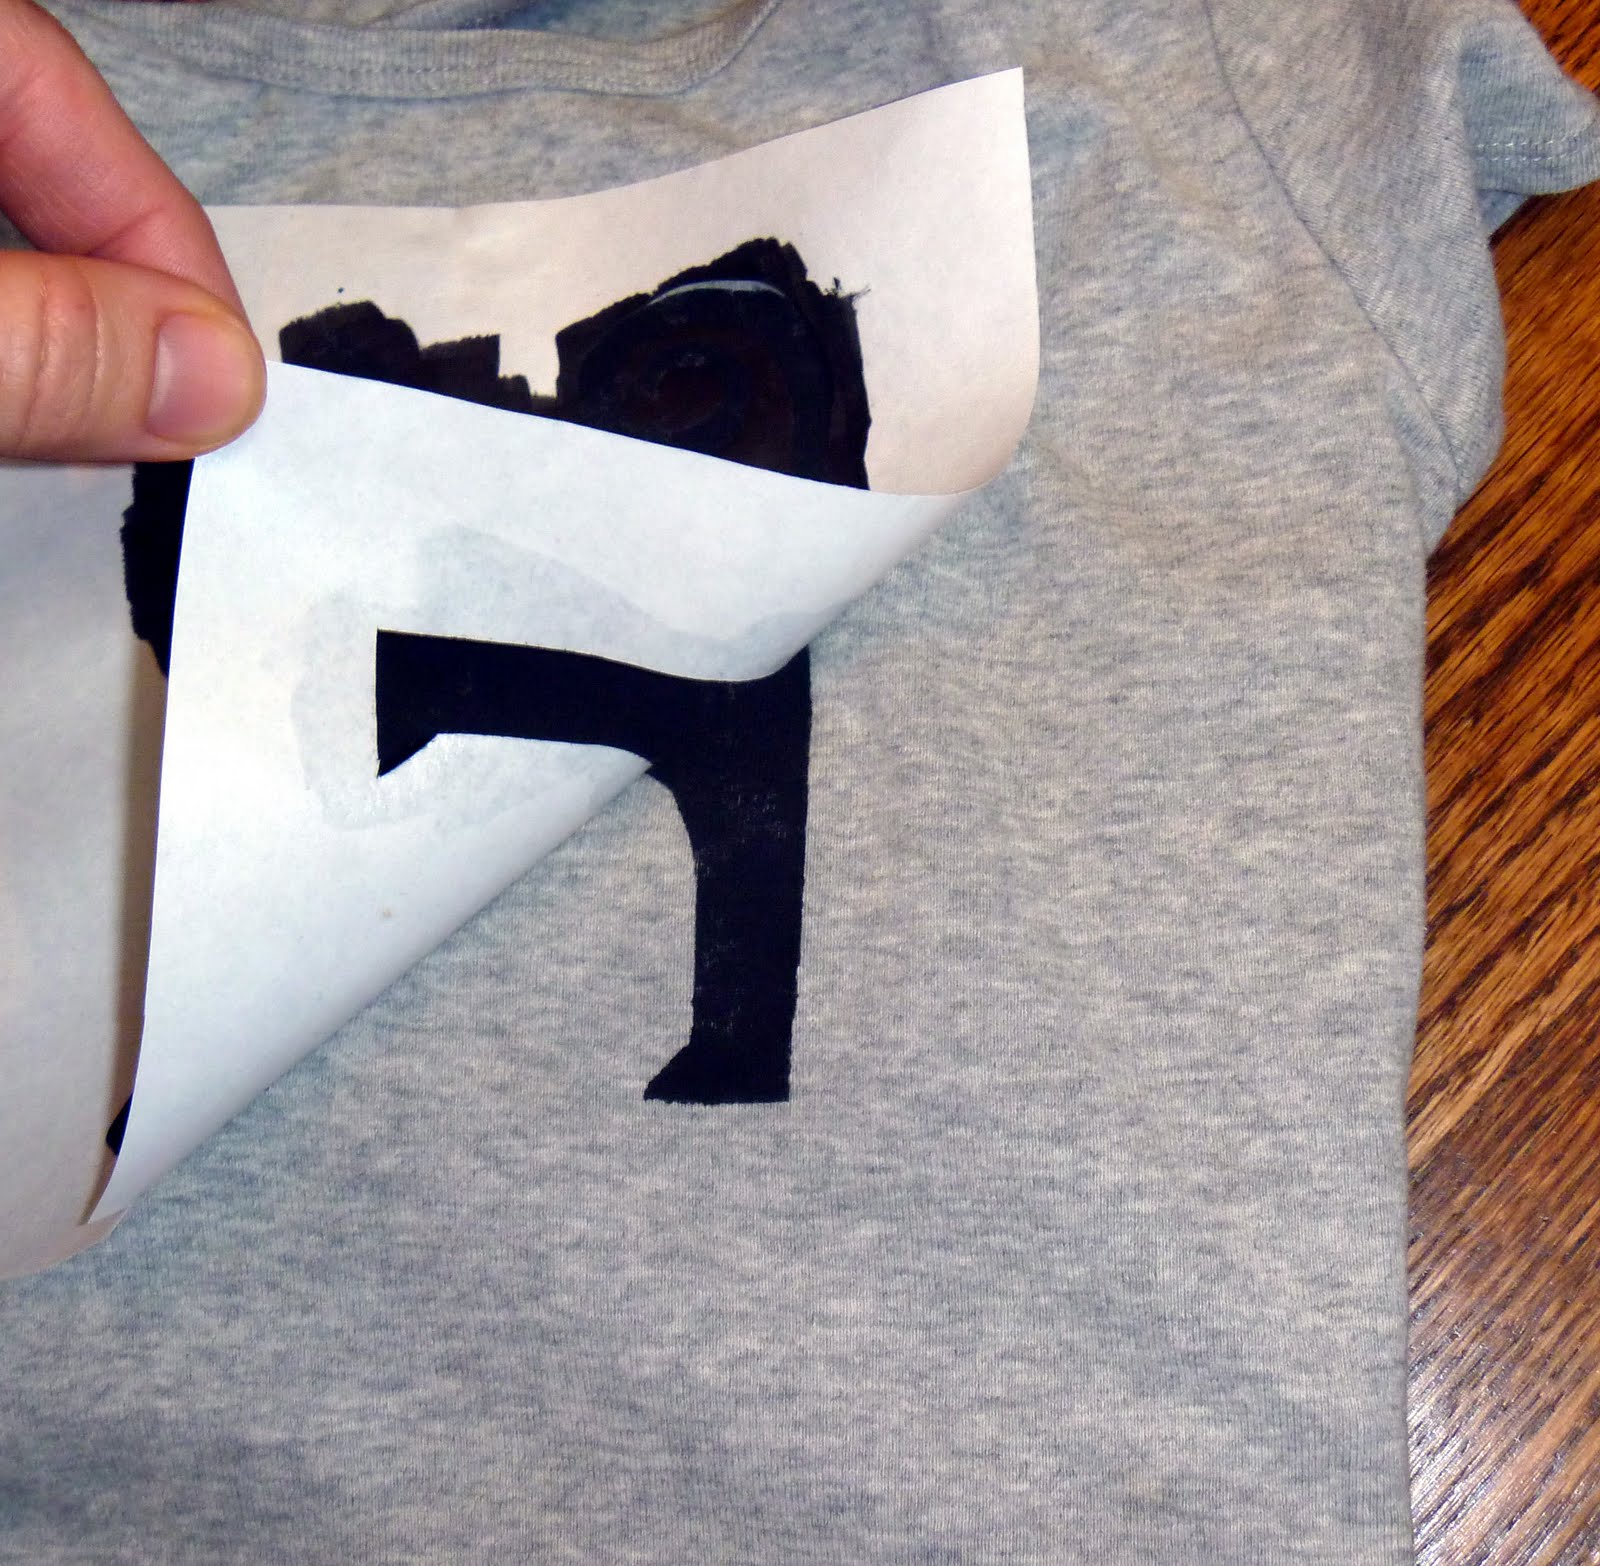
Next, using a hot dry iron, I pressed the paper, shiny side down onto the t-shirts. First I ironed the main part of the design then added the little "island pieces" last. Those were the trickiest parts.

After placing a piece of cardboard inside the shirt and using acrylic paint mixed with fabric medium, I painted on the designs, being very careful around the edges with brushstrokes moving inward, not outward.

Once they were painted I just couldn't wait the 4-6 hours for them to dry. I propped them up and pointed a fan on them and they were dry in less than an hour. Then comes the fun part, peeling the paper off!
My edges aren't perfect and some parts could've used a second coat, but I'm lazy and decided they looked just fine. Better than fine actually, I was quite pleased with how they all turned out. The kids thought they were pretty cool too.

Here's a little closer look at the designs-

After waiting the full 24 hours, I used a hot dry iron to "set" the paint. The shirts need to be washed inside out as well.
What a fun project this was! Now, I have a blank tote bag calling my (and my freezer paper's) name...
I'm linking this to Cauldron Crafts, a fun array of crafty ideas just in time for the Halloween season, brought to you by my friends at Distant Pickles and Fabric Donkey. If you link YOUR spooky craft idea to them soon, you could win a fabulous fabric bundle!
3 comments:
Those came out totally cute, Greta!! I love them tons. And am now going to steal your idea shamelessly. The upside down bat is to die for!
(and I used a blowdryer to speed up drying last time I did freezer paper stencils. hah!)
Those turned out great! I find I have a hard time wrapping my head around the reverse image of it all.
Karen
Adorable! I <3 your bat!
Post a Comment